How fun and pretty are throw pillows? These gorgeous and beautiful accents have become a home staple in the design world for decades. Throw pillows are one of the most accessible and reasonable ways to give your home a quick update and can give a room a whole new look with minimal effort. There are numerous colors, designs, and textures to update anything from a couch, loveseat, or chair to a bed or even a bench in your entryway.
How often do we put out a throw pillow and not even think twice about the care and maintenance? But when it comes down to it, throw pillows get a lot of use and can collect a lot of dirt, dust, and stains. Luckily, they can be cleaned—some can even be machine washed. We have put together a helpful guide to freshen up your stunning pillows and some quick tips for maintenance so you know exactly how to clean your throw pillows.
How To Clean Throw Pillows
As with most things, throw pillows can be machine-washed, washed by hand, spot-treated, or dry-cleaned—it really all depends on your throw pillow and the material it is made from. While the proper method will rely on the material and structure of the pillow, the condition and scope of the dust and stains are also factors. It is crucial to treat spills and accidents as soon as you see them so they don’t have the chance to set in.
Aside from these factors, maintenance cleaning a few times a year should keep decorative throw pillows looking like new.
It’s common now for most throw pillows to come in two pieces. These two pieces are an insert and a removable cover. This allows more accessible and straightforward care. The first and crucial step to cleaning your throw pillow, no matter the cleaning method, is to start by testing a small area to confirm that it’s safe to proceed.
To do a small test clean: Add a bit of water and your choice of mild detergent to a clean white towel or rag, then dab the pillow in an inconspicuous area for 30 seconds. You can also use a wool-specific detergent or upholstery cleaner.

Check the towel for dye transfer and the pillow for fading. If you don’t see any signs of color change, you are good to go!
It’s essential to consider the fabric of your pillow cover before you begin. You’ll learn more detailed info about cleaning different fabrics further down in this article, but here are the basic how-tos for each of the techniques:
Hand-Washing
If you’re uncertain of the cover’s fabric or whether the fabric will hold up to warm or hot water temperatures, or even the harshness of a spin cycle, it’s your best bet to hand-wash the pillow covers. Start by spot-treating any stains or marks with the proper cleaner.
Next, fill a basin or sink with cool water, a small amount of mild detergent, and immerse the pillow covers. Let soak for several minutes, then carefully work out any remaining dirt with your hands. Rinse well, avoid squeezing or wringing, and let air dry.
Machine Washing
You always want to take a soft approach and use the delicate cycle, the proper water temperature for the fabric, and a minimal amount of mild detergent.
It’s advisable not to toss pillow covers in with the regular laundry but to do a small load of comparable fabrics and like-colored pieces. After they are clean, check your cover’s care tags to see if they can be machine-dried or air-dried. If there are no tags or they are missing, it’s best to air-dry it in a well-ventilated area and avoid direct sunlight. When fully dry, return the cover to the insert.
Dry Cleaning
If your throw pillows have embellishments, such as beading, appliques, or embroidery, attempting to spot-clean such delicate details could damage them. Most dry cleaners will take these kinds of items, but you can always call ahead and ask first.
Spot Treating
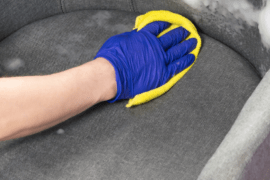
In most cases, the finer the fabric, the more likely you are to want to avoid totally submerging the whole cover—this is where spot treating comes in. Everyday dirt may be vacuumed away using the upholstery attachment with minimal pressure.
Oily stains may pose a bit of a problem but you can respond by using baking soda to the spot for several hours, then vacuuming it up. For everyday water-based spills, such as milk, or other liquid drinks, soak up the extra liquid with a clean cloth or towel, moisten a soft sponge with water and mild soap, blot the area, and gently dab the stain. Rinse any remaining soap using a clean sponge or damp towel.
If you want to speed up the drying process, you use your blow dryer on a cool setting.

Different Pillow Fabrics
To avoid damage and shrinkage to your throw pillows, you will want to know the fabrics you are working with. This will ensure your success in keeping your throw pillows looking fresh, new, and clean. Fabric information and cleaning suggestions can usually be found online, or they may be printed on a care tag, sewn onto the seam or piping on the outside of a pillow, or inside a removable cover.

Some of the most common fabrics for throw pillows are:
- Acrylic: a soft, lightweight, yet durable synthetic, is generally cold-water machine washable. Line dry or use the “air fluff” (no heat) setting in the machine.
- Cotton: usually safe in a warm-water machine wash. Tumble dry on low heat to avoid shrinking.
- Polyester: can usually be tossed in a cold-water machine cycle. Tumble dry on low heat.
- Linen: can warp and wrinkle if washed, so spot treating or dry cleaning is best. Lay flat on a towel to dry, as clothespins can leave bumps on linen.
- Silk: (Note — very fragile) It may hold up in a hand wash in cold water, with mild soap, albeit with no scrubbing or wringing. Instead, gently press out excess water and let air dry. Heat will likely shrink or damage the silk, so lay it flat on a towel to dry.
- Velvet: best to spot clean. If the entire pillow is dirty, velvet might do well in a cold-water hand wash. Lay flat on a towel to dry so clothespins won’t mar the fabric.
- Satin: can typically stand up to a cold-water machine wash. Because satin may be woven from various fibers, it’s safest to line dry or tumble on low.
- Velour: usually fine in a cold-water machine wash; tumble dry on low or no heat.
- Wool: while wool is relatively stain-resistant, it can still get dirty. In this case, spot treating or dry cleaning may be best. If you opt to hand wash it, soak it in cool water with a minimal amount of detergent explicitly made for wool and lay it flat to dry.
Cleaning Tips for Pillow Inserts
It’s less likely that your pillow inserts will get soiled or stained, but they can accumulate dust that filters through the cover’s fabric. This is why it’s a good idea to vacuum inserts on both sides or shake them vigorously outdoors to freshen them up.
Most inserts are polyester, so if a significant spill should soak through the cover, feel free to toss the insert into cold- or warm water and gentle-cycle wash, using a small amount of detergent. You can tumble dry on low heat, using dryer balls to restore the insert’s fluffiness and shape. Be sure the insert is totally dry before zipping it back in the cover.
If your pillow inserts are made of foam or memory foam, you will want to avoid the previously mentioned cleaning method. In this case, it’s best to spot-treat spills with cold water and a small amount of detergent since the insert could be damaged in a machine’s spin cycle. You will also want to avoid squeezing and wringing the foam while wet. Let foam air-dry entirely in a well-ventilated area before returning it to the cover.
Throw Pillows Without Removable Inserts
The most challenging throw pillow to clean is one where the insert is not removable. This is sometimes the issue with vintage or handmade pieces. To attack this problem, start by gently vacuuming the pillow on both sides using an upholstery attachment; this should suck up a good amount of surface dirt, hair, and other debris.

You can then pretreat stains or marks with the spot-treating method described earlier in this article. If you need to “spot treat” the entire surface, avoid entirely submerging one of these pillows in water since a wet-in-the-center insert can invite mildew.
Keeping Throw Pillows Fresh
- Choose machine-washable pillow covers for high-use rooms, especially if you have kids or pets.
- Place your higher-quality pillows in less-trafficked areas or rooms where snacking or eating is not allowed.
- Attack any spills as soon as you notice them so dirt and stains won’t set into the fabric as you sit against the pillows.
- Include throw pillows in your regular vacuuming routine.

Tips For Keeping Your Throw Pillows Cleaner Longer
- Regularly dusting or vacuuming your throw pillows will keep them from needing cleaning for a more extended period of time.
- Using throw pillow covers will also make it more painless to clean them often, especially if they are machine-washable.
- Keep hard-to-clean throw pillows in harder-to-reach places where dogs, cats, kids, and people’s feet won’t soil them often.
How Often Should You Clean Throw Pillows?
Typically, you should wash throw pillow covers once a month, while the filling within the pillow requires washing every other month. You can push the cleaning schedule back slightly if you don’t interact with the pillows often, but you should try keeping it within this time frame.
If your pillows get a lot of use, wash the covers every few weeks. The exact time frame will alter from household to household but don’t go more than a month without washing covers or two months without washing fillings.


